Thursday, October 13, 2011

Pleasure Tools


A version of this article appeared in the Montreal Mirror on October 13, 2011 (here).

When it comes to kitchen equipment, I believe in minimalism. As a general rule, the home cook should aim to have a basic set of high-quality, multi-purpose tools. Specialized, single-purpose tools are only worthwhile if they allow you to do something you could not accomplish with a multi-purpose tool, or could accomplish only through a great deal of agony. Home cooking, like other activities that result in the furtherance of human life, should be pleasurable.

Two narrowly specialized kitchen tools from which I have been deriving pleasure continuously for years now are the olive pitter and the lemon squeezer. In both cases, the tool’s arrival in my kitchen altered my relationship to the ingredient it helps to process.

The Olive Pitter
If you want to use olives in a dish while avoiding dental work, it is advisable to use pitted olives. The trouble with olives that are sold pitted is that they are usually crap. If you want to use really good olives, you will have to pit them yourself. If you have tried doing this without a dedicated tool—for instance, by slitting the olives and trying to squeeze out their pits—you will know that it is a pleasure tantamount to masturbating with a cheese grater.

Figure 1. An olive is shown who's boss.
Not so if you own an olive pitter, a small, simple tool that should set you back no more than $10 (Figure 1). You will be amazed by how fast, in fact, by how fun, it is to show those olives who’s boss. You can rip through a cupful of kalamatas in just a couple of minutes (Figure 2).

Do not confuse an olive pitter with a cherry pitter! They look similar but the latter has a much larger receptacle for the fruits; it will not hold olives snugly and instead of removing their pits it will turn them to pulp. Any merchant who tries to convince you otherwise is a big fat liar.

Figure 2. Look ma, no pits!


The Lemon Squeezer
The case of the lemon squeezer is somewhat different from that of the olive pitter, in the sense that most of us already have a specialized tool for extracting juice from lemons and other smaller citrus fruits—i.e., a juicer. I am referring to those ridged cones made of wood, plastic or glass that you impale lemon halves on and twist to wring out their entrails. They do effectively extract the juice, but they also take out pulp, pith, and seeds. Herein lies the problem with juicers: you just want the juice, not the other junk, and especially not the seeds. You have to take certain cumbersome steps to sepa­rate junk from the juice, straining it out with a sieve or removing it manually with a spoon.

Figure 3. That lemon got juiced.
The lemon squeezer, a tool that looks like a garlic squeezer on steroids, elegantly solves this problem (Figure 3). You load your lemon or lime half, flat side down, into a receptacle with small holes that only allow juice to pass through. This means you can squeeze the juice directly into your dish; the seeds, pith, and pulp are trapped inside the squeezer. No fuss, no muss.

Squeeze hard enough and you will not only extract every last drop of juice but also some of the extremely fragrant citrus oil from the rind! After squeezing, open the squeezer and tilt it over your compost or garbage bin and watch that dead, inside out lemon rind fall out along with the seeds. It’s so efficient it would give a German engineer a boner.

Tapenade Recipe
Having these tools will enable you to make dishes that would otherwise have been tedious, if not impossible, to make. For me, one such dish is tapenade—the classic, southern French olive paste. It requires significant quantities of both pitted olives and lemon juice. Below, I provide you with a recipe for tapenade that I believe to be vastly superior in taste (not to mention inferior in cost) to any of the prepared products available on the market.

Ingredients
  • 1 cup pitted black olives (works well with kalamata olives)
  • 2 tbsp capers
  • 8 anchovies
  • 2–3 cloves garlic juice of 1 lemon
  • 1 tbsp Dijon mustard
  • 3 tbsp olive oil
  • 2 tbsp finely chopped parsley
  • 1 tbsp finely chopped fresh thyme leaves
  • 2 tbsp brandy (optional)
  • 1 tsp freshly ground black pepper


Procedure
Put all of the above ingredients in a small food processor (Figure 4) and blend until a coarse paste forms (Figure 5). Very difficult!

Figure 4. Before.
Figure 5. After.
Tapenade is delicious on bread, with cheese and tomatoes.

Good appetite.

Tuesday, August 23, 2011

Pickle Yourself


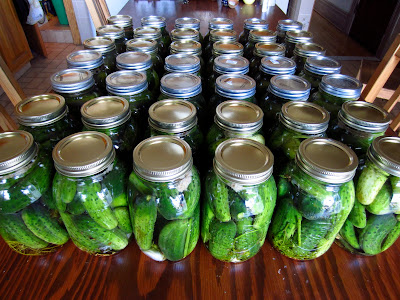
In this installment, dear reader, I will show you how to make brine-fermented dill pickles, the superior way to preserve cucumbers. These are also know as "deli-style" or "kosher" dill pickles. They are made without vinegar.

The Science of Dill Pickles
Cucumbers, like other vegetables, can be preserved by immersion in a salty, acidic solution. The combination of salt and acid inhibits the growth of certain bacteria and therefore protects the cucumbers from spoilage and decomposition. Of course, it also considerably alters their texture and taste, usually in a very positive way.

The nature of the acid in which cucumbers are preserved can vary. Like many other vegetables, they can be preserved in vinegar. Any clear or lightly flavoured vinegar, such a cider or white wine vinegar, will do. But they can also be preserved in lactic acid produced through fermentation. This is nothing unusual; there are many other familiar foods, such as sauerkraut, yogurt, and even certain types of sausage, that are created through lactic acid fermentation, which gives them their complex, sour flavour while helping to extend their shelf life. You can easily tell a jar of vinegar pickles and fermented pickles apart; the fluid surrounding the pickles will be clear in former and always cloudy in the latter (fig. 1). Also, in grocery stores, the former will be found on the shelves whereas the latter will often be kept in a refrigerator.

fig. 1


Fermentation, strictly speaking, is any process that consists of bacteria or yeasts (or some combination thereof) consuming sugars and yielding another substance, such as alcohol or lactic acid. For some types of fermentation, a bacterial or yeast culture needs to be added to start the process. This is not the case with cucumbers—the bacteria we seek already naturally occur on their skin.

To get the right kind of fermentation—we are making pickles, not cucumber wine—we need the right kind of bacteria to grow. For this, we need to create the right kind of environment. Very conveniently, it just happens that friendly, lactic acid producing bacteria thrive in salty environments whereas their unfriendly, homicidal cousins don’t. So, to achieve lactic acid fermentation, cucumbers need to be submerged in brine with the right concentration of salt. Too little salt and the unfriendly bacteria may gain a foothold and destroy the cucumbers before they have a chance to sour. (They could also turn into poison.) Too much salt and the pickles may never sour, as even the friendly bacteria’s salt tolerance has its limits.

But why?
Why bother with this bacterial fermentation when you can just dump some vinegar on your cukes? The answer is that fermented pickles, in my not-so-humble opinion, taste better. They are less astringent and have a fuller, more complex, sour flavour. They happen also to be probiotic and are a source of the otherwise tricky to obtain vitamin K. Another advantage is that you can use their brine. In central European folk medicine, pickle (and sauerkraut) brine is thought to be an unparalleled hangover cure. Otherwise, Poles like me add fermented pickle brine to various soups, to a very delicious effect. One such soup is chłodnik (a.k.a., cold borscht).

Recipe
The key to success for fermented pickles is the relative quantity of cucumbers, water, and salt. If you have more or less cucumber, it is imperative that you adjust the amount of water and salt accordingly to get the right salt concentration in the end. I provide the quantities for 1 kg (2.2 pounds) of cucumbers to allow for easy multiplication. You will probably want to make more than just one kilo, as each kilo will yield about one-and-a-half to two one-litre (one quart) jars of pickles, depending on the size of your cucumbers. The remaining ingredients are flexible. You can change the quantities or omit them altogether (though only a fool would omit dill and garlic). I permit you to flavour your pickles as you like. Please express yourself!

Some people ferment their pickles in a single, large, non-metalic vessel and pack them into sterilized jars later, once they are sufficiently fermented. I prefer packing them into sterilized jars immediately and letting them ferment therein. This method involves less work and allows me to vary the flavourings across jars.

To sterilize, I wash my jars and lids thoroughly (use a dishwasher if you have one) and put them in the oven at 120°C (250°F) for 15 minutes. This is far easier and faster than immersing them one-by-one in boiling water and just as effective.

I add a piece of sourdough bread (whole wheat or rye) to each jar. Sourdough breads contain friendly bacteria and naturally occurring yeasts that will complement the bacteria that dwell on the cucumbers’ skin and help kick start the fermentation process. The greater diversity of bacteria will also impart the pickles with a fuller, funkier bouquet. This is a matter of preference—I permit you to leave the bread out.

Ingredients
To be multiplied to match the quantity of cucumbers:
  • 1 kg Kirby or other pickling cucumbers*
  • 34 g salt (iodine-free)
  • 700 mL water
  • 3-4 cloves of garlic

Per 1 litre (1 quart) jar:
  • 1 branch of dill flowers (fig. 2) or 1 tsp dill seeds
  • ½ tsp mustard seeds
  • ½ tsp black peppercorns
  • ½ tsp coriander seeds
  • ¼ tsp chili flakes
  • 1 bay leaf
  • 1 small square of sourdough whole wheat or rye bread (about 2 cm x 2 cm or 1” x 1”)

*The smaller the cucumbers, the better. They will have a thinner skin, be more crunchy, and be easier to pack into the jars.

fig. 2


Procedure
  1. You will mix the water and salt and bring to a boil in pot. You will allow the brine to cool to room temperature before using.
  2. You will thoroughly wash the cucumbers. You must remove any stems that remain attached to them. Discard any cucumbers that are excessively wilted, rotting, or moldy.
  3. You will fill the sterilized jars with the flavourings.
  4. You will insert the cucumbers into the jars. Pack as many as you can in up to 3-4 cm (1-1.5”) from the top of the jar to leave room for the bread and to ensure complete immersion in brine. Pretend you are doing a puzzle (fig. 3).
  5. You will put a square of bread in each jar, if using.
  6. You will fill the remaining space in each jar with the cooled brine. Make sure the cucumbers are completely immersed but leave a bit of headspace between the surface of the brine and the lip of the jar. If the fluid touches the lid, it may cause it to corrode.
  7. You will put the lids on the jars but you will not seal them tightly. Gases that form while the pickles ferment must be allowed to escape or the jars will pressurize.
  8. You must now store the jars somewhere away from sunlight, where they will be at room temperature.
fig. 3


After three or four days, you will have what are known as half-sour pickles. You may eat them at this point—they will be slightly sour but will still retain some of the natural freshness of a cucumber. If you want to keep some of your pickles in this half-sour state, you must transfer them to the refrigerator, which will effectively stop the fermentation process.

Those that remain at room temperature will become full-sour pickles after approximately two weeks. The cucumbers will have taken on the characteristic, dull yellow-green colour and the brine will have become cloudy (fig. 4). After this point, the environment in the jars will become so acidic that even the friendly lactic acid producing bacteria will stop functioning—they will have in effect pickled themselves to death. The fermentation process will therefore grind to a halt and the flavour of the pickles will stop evolving. You must now tighten the lids on the jars to prepare your pickles for long-term storage. They store perfectly well at room temperature for up to a year. However, after opening a jar, you should store it in the fridge and eat the contents within a month.

fig. 4


Good appetite.

Friday, July 15, 2011

You Will Eat Mackerel

Dear reader, in the present installment of Culinary Propaganda, I offer you three lines of argument for why mackerel (fig. 1), a surprisingly underappreciated fish, will be on your plate. I also suggest a few particularly delectable ways to enjoy mackerel, including an original Szef Bartek recipe.
fig. 1

The first line of argument is about being a responsible consumer of seafood. The global stocks of many species of fish have been considerably degraded over the last century, and some are on brink of total annihilation. Mackerel is not among these. On the North American Atlantic coast, it has long been and continues to be considered a junk fish. Few commercial fishermen seek it out as their primary target. Most are caught as by catch and are used as bait or for fishmeal. A friend originally from the Canadian east coast told me that, when she was growing up, fishermen there would ridicule anyone who wanted to eat mackerel.

Mackerel is also widely distributed on the other side of the Atlantic, where it receives only a modicum of respect. Certain Northern Europeans, including my own countrymen, occasionally eat it, mostly in smoked form (fig. 2).

fig. 2


As a sidenote for my fellow Montrealers, mackerel is not only a sustainable fish, but it could also be the closest thing we have to a locally caught saltwater fish. Its range starts in the Saint Lawrence River estuary, which is only a few hundred kilometers downriver from our city. The only hitch is that few fishmongers seem to have fresh mackerel. I have seen some at La Mer (1840 René-Lévesque E.). I have also found frozen raw mackerel from the Magdalen Islands at Loblaws, of all places. However, smoked mackerel, using fish from Canadian waters, abounds in local grocery stores. Yes, run-of-the-mill grocers like Metro and IGA carry them. You will look in the fish or the deli section.

The second line of argument has to do with the nutritional value of mackerel. Like other small, oily fish such as herring and sardines, mackerel are rich in those much sought after omega fatty acids, particularly those of the #3 variety. At the same time, they are free from (or certainly very low in) mercury and other fat soluble toxins that tend to permeate the flesh of larger predatory fish, such as tuna and swordfish. Pregnant and breastfeeding ladies, take note.

The third and most important line of argument in favour of mackerel is about its outstanding culinary properties. Mackerel’s flesh is firm, dark, and pleasantly flavourful, but not as pungent as herring or sardine. Mackerel are actually members of the tuna family and their flesh, after being skinned and boned, is surprisingly similar—like a miniaturized, albeit oilier, version of tuna. In my experience, where only small chunks or flakes of fish are required, canned mackerel can very successfully stand in for canned tuna.

Even when whole, mackerel is an easy fish to prepare. Its skin is free from scales and requires no cleaning. It can be left on for cooking but, if desired, it is very easy to remove. Another plus is that mackerel has rather large, thick bones for a small fish. After cooking, the backbone and spines will practically fall off of the flesh. And there won’t be any nasty, esophagus-puncturing surprises. If you want to cook boneless flesh, they are a cinch to filet, also thanks to the coarse nature of their bones.

Mackerel in the Kitchen
Mackerel take especially well to frying, roasting, and grilling. As they are robustly flavoured fish, they are best complemented by strongly flavoured garnishes and sauces, with lots of spice and acidity. Anything tart and tomato based, especially with garlic, will go with mackerel. Mackerel also make an excellent base for escabeche—a Spanish technique for preparing fish that involves frying fish along with aromatic vegetable then dousing the whole lot in wine and vinegar and letting it pickle overnight, to be served cold (try this excellent recipe). If you get some really fresh mackerel, you could also trying curing them in a mix of salt, sugar and dill—basically gravlax (or gravad lax) with mackerel in place of salmon. Hugh Fearnsly-Wittingstall, the food writer with possibly the most criminally British name, calls this “gravad max” (recipe here).

Mackerel, like salmon, also takes extremely well to smoking. In fact, mackerel in smoked form seems to be a lot more available, at least where I live, than in the raw form. This is not surprising, given how delicious it is—more delicious, I think, and certainly a lot cheaper than smoked salmon. I most often enjoy smoked mackerel on butter-smeared piece of toast or crisp bread, with a little squeeze of lemon juice. But I would also highly recommend trying it atop a bagel with cream cheese, in lieu of lox. Indeed, smoked mackerel makes an excellent substitute for smoked salmon pretty much in any situation where the latter’s pink colour is not crucial to the aesthetics of the dish.

More recently, I have also taken to experimenting with substituting bacon with smoked mackerel—with great success, I must say. The most fruitful of my adventures in substitution has been in realm of potato salad. A favourite simple recipe involves combining boiled young potatoes with a vinegary homemade mayo, diced bacon, dill, and green onions. Recently, I tried replacing the diced bacon with shredded smoked mackerel. This turned out to be rather tasty. I have since made a few additional embellishments to the recipe, such as replacing white wine vinegar with lemon in the mayo (lots of lemon!) and adding anchovies and capers for a flavour boost. I have codified and reproduced this recipe below for your benefit, dear reader. Obedience will be rewarded, trust me.

Szef Bartek’s Smoked Mackerel Potato Salad
Smoked mackerel should not be too hard to find. As noted above, they are readily available in grocery stores here in Montreal. For those of you residing in other cities, you are very likely to find some at a Polish, Russian, or German delicatessen near you.

Ingredients
  • 1 kg young potatoes (use young Yukon Gold if you can find them)
  • 1 tbsp salt
  • 2 smoked mackerel filets (approximately 250 g), shredded (fig. 3)
  • 1 bunch dill, chopped
  • 1 bunch green onion, white and green part, thinly sliced
  • 5-10 anchovy filets (optional)
  • 3-4 tbsp capers* (optional)
  • 1 quantity lemony mayo (recipe below)
    fig. 3

    *I prefer capers packed in salt to those packed in the vinegary liquid. In the latter type, I find the vinegar overwhelms the capers' floral perfume. They are after all unopened flower buds. If you get salt packed capers, rinse them thoroughly to remove the salt. You can soak them in water for a while to further  desalinate them.

    Procedure
    1. You must wash the potatoes thoroughly, scrubbing any black spots of dirt. If the potatoes are more than 3 cm in diameter, cut them in half. If they are more than 5 cm in diameter, quarter them.
    2. You will put the potatoes in a pot and cover them with water. You will add 1 tablespoon of salt. You will cover the pot and place it on maximum heat. When the potatoes come to a boil, you will turn the heat down to medium.
    3. While the potatoes are boiling, you will prepare the mayo (see below). After 15 minutes, you must check the potatoes’ tenderness with a fork. If fork does not penetrate easily, you will continue boiling them. You will check again every few minutes until fork penetrates easily. You will drain the potatoes and wash with cold water to cool them down.
    4. Once the potatoes are cool enough to touch (it is okay for them to be slightly warm), you will place them a bowl. You will now add all of the remaining ingredients to the bowl. You must mix thoroughly. You will check the seasoning and add salt and pepper as desired. Your mackerel potato salad is now ready to serve.


    Alternative Versions

    Szef Bartek’s Bacon Potato Salad:
    As noted above, this salad was derived from a recipe that involved bacon. Should you wish to make the bacon version, replace the mackerel with the same quantity of bacon and omit the anchovies and capers. Cut the bacon into small dice or strips and fry them until just slightly browned. Drain the fat and let the bacon bits cool before adding them to the salad.

    Szef Bartek’s Chorizo Potato Salad: Another variation on the theme I have tried and enjoyed very thoroughly involves using Portuguese chorizo instead of bacon. Likewise, cut the chorizo into small dice and brown it slightly in a frying pan; drain and cool before adding to the salad. A few drops of sherry vinegar before serving will give the salad a nice zing.

    Lemony Mayo
    Dear reader, if you have never made mayonnaise yourself, this recipe is likely to be quite an eye-opener. You will see how ridiculously easy it is. All you require is a small prep food processor or an immersion blender with a small receptacle. A full size food processor will not work as there will not be enough material for the blade to catch early on in the process.

    Note that lemon juice can be replaced lime juice or a vinegar of your choice. White wine vinegar in particular makes for a nice mayonnaise. Add some garlic to this recipe and you an aioli on your hands.

    Ingredients
    • 2 egg yolks
    • 1 tbsp Dijon mustard
    • 2-3 lemons, juiced
    • 1 cup of olive oil
    • salt
    Procedure
    1. You will put the yolks, mustard, and lemon juice in the blender receptacle.
    2. Turn on the blender and begin pouring in the oil slowly. Continue blending and gradually pour in the rest of the oil.
    3. You should now have a thick emulsion. You will taste it to check the seasoning. Add some salt if necessary.
    You’ve got mayo.

    Good appetite.

    Sunday, April 17, 2011

    The Cardoso Solution


    Dear reader, near the end of the harvest season there is an overabundance of green tomatoes. As the weather grows cooler and the days shorter, these fruits don’t manage to reach full-red maturity on the vine. It’s better to pick them than to let the first frosts bite them. This is why in late September and through most of October, the market near Culinary Propaganda Headquarters is flooded with bushels of these green globes, usually priced quite modestly. Similar situations probably occur at markets and greengrocers near you. But how many fried green tomatoes can one eat? What else can one do with this bounty?

    I knew no answer to this question until I encountered a force of nature called Mrs. Cardoso, my feisty Portuguese landlady. A few years ago, on a balmy late-September morning, not long after I occupied the apartment on the upper floor of Villa Cardoso, a one-litre jar with a green, vegetable-like substance materialized on the table on my terrace. On it there was a note that said:


    There was no indication as to the exact nature of this concoction. Curiosity piqued, I wasted no time to crack open the jar and inspect its contents. As I removed the lid, an enchanting garlic and herb aroma, with a vinegary undertone, immediately tickled my nostrils and opened the salivary floodgates. I dug in, still not quite knowing what I was getting into. I removed a surprisingly firm, green, herb- and garlic-speckled disk from the jar, which I eventually recognized as a slice of tomato.

    It tasted better even better than it smelled, and it had a wonderful crunch to it. It was hard to stop eating this. I went through a quarter of the jar in one go. I later offered some to Einar Einarsson, my roommate. Being from Iceland, he views most vegetables other than the potato with great skepticism. Though initially hesitant, he too quickly fell under the spell of the Mrs. Cardoso’s green tomatoes. Another quarter of the jar vanished in a matter of minutes. The remainder got decimated within a day.

    I was hooked and I needed more. My upbringing prevented me from asking Mrs. Cardoso outright for another jar. I expressed gratitude profusely and flattered her excessively, hoping she would get the hint. It worked, but the second jar only lasted two days. I knew I could not go on supplicating for more, so instead I humbly asked Mrs. Cardoso to reveal the recipe. She was more than happy indulge this request. She invited me over and we made a new batch together so that I could see the process. And now, dear reader, I pass this knowledge on to you.

    The recipe has never existed in written form, until now. Mrs. Cardoso makes her marinated green tomatoes by eye and, since I learned from her, so do I. The last time I made them (whilst shooting the accompanying video), I kept track of my use of the key ingredients to have a ballpark idea of the required quantities. Please understand, dear reader, that this method for preparing marinated green tomatoes is not an exact science. You must treat the recipe as an outline, not a chemical formula. You will try it a few times with a smaller batch of green tomatoes to get a feel for it. I enjoin you to adjust things as you see fit. In particular, the quantities of vinegar and of the different flavourings—garlic, chilli, and herbs—are flexible. You will reduce or omit any you don’t like, boost the ones that you do. I list the suggested quantities for 1 kilo of green tomatoes, for easy multiplication. I usually make it in 5-10 kilo batches.

    Equipment:
    • a large stainless steel bowl
    • a kitchen towel
    • a vegetable peeler or pairing knife for coring
    • a chef’s knife for slicing and chopping
    • tongs or salad utensils for mixing
    • jars for storage

    Ingredients:
    • 1 kg green tomatoes
    • 5 tablespoons pickling salt or coarse sea salt
    • 2-4 cloves of garlic
    • 2-3 branches of flat leaf (Italian) parsley
    • handful of fresh basil leaves
    • handful of fresh mint leaves
    • 5 sprigs of fresh oregano
    • 5 sprigs of fresh thyme
    • 5 sprigs of fresh rosemary
    • 1-2 red Italian (or similar) chilies
    • 2 teaspoons of fennel seeds (optional)
    • ½ cup of white vinegar or white wine vinegar
    • ¼ cup of olive oil
    A note about the tomatoes: This recipe must be made with under-ripe, hard tomatoes. Beware of tomato varieties that are green when ripe! Ripe tomatoes will lack crunch and they will probably turn to mush when you try to toss them with the other ingredients. I have tried marinating various varieties of tomatoes and I find this method works best with run-of-the-mill, round field tomatoes. I have tried green plum tomatoes (both Roma and San Marzano) and did not much like the results.

    A note about the garlic: You will not use garlic imported from China, especially the ones sold four-for-a-dollar in the sock-like packages. I have no prejudice against the Chinese nation, and have nothing but admiration for their culinary traditions. It’s just the garlic they export seems to invariably lack potency and taste bitter. You will pony up for locally grown garlic if possible, or at the very least for good quality garlic from one of the warm and bountiful parts of your continent. Here in North America, that means California. The cloves should be hard as rock, creamy white (not yellowish!) on the inside, and sticky to touch. It will no doubt cost you more, but your obedience will be rewarded.
    Procedure:
    1. You will wash and wipe dry the tomatoes. You must core all of them with the peeler or pairing knife.
    2. You will slice the tomatoes about 0.5 cm thick. Place them in the stainless steel bowl and sprinkle salt as you go along. The idea is to sprinkle some salt over all of the slices.
    3. You will cover the sliced and salted tomatoes with the kitchen towel. You will leave to cure for 24 hours.
    4. You will drain the fluid that has leached out of the tomatoes. Do this either by holding them down in the stainless steel bowl using a lid or a large plate or by transferring them to another bowl using a slotted spoon.
    5. You must now strip all of the fresh herbs, except the parsley, from their stems. You will peel the garlic cloves and stem the chili.
    6. You will finely chop all of the herbs, the garlic, and the chili. Use you chefs knife or a mezzaluna to do this. Chop, chop, chop. It must be very fine.
    7. You must put the chopped herbs, garlic, and chili in the bowl with tomatoes. Add the fennel seeds, if using. Pour in the olive oil and vinegar. Toss the tomatoes to thoroughly mix together all of the ingredients.

    The tomatoes are now ready to eat. Whatever you don’t eat right away, you must pack tightly into sterilized jars and store in the fridge. They will keep for months.

    You can enjoy these as a side dish or as a condiment. In the latter role, they are versatile: they go well in sandwiches, with cheeses, meats, or both! I love to use them on grilled pork chops with cheese. Brine a pork chop, fry it in butter and olive oil or grill it. After you’ve cooked one side, turn it over and cover it with slices of sharp cheese (aged cheddar and gruyere work nicely) plus a few slices of marinated green tomato on top. Be sure let the cheese melt and mingle with the meat the tomatoes. As with all meats, when it’s cooked, remove from the pan or grill and be sure to let it rest a few minutes before digging in. This allows the boiling juices inside the meat to settle.
    Good appetite.


    PS. You will follow Szef Bartek on Twitter @SzefBartek.

    Thursday, March 17, 2011

    Sausage Party


    Dear reader, surely you are desperate for someone to impose some structure on your culinary life. I am writing this short message to assure you that I have not forgotten about you. It's just that I have been very busy over the last few months. Among other things, I have been consumed with making sausages and showing other people how to do it. I recently gave a workshop on this very subject. You will view the photographic evidence found here (courtesy of my friend and workshop co-organizer Natasha Pickowicz). You will also read the short article about making fresh sausages that I just published in the Montreal Mirror.

    The structure you desperately need will be put into place soon: a second Culinary Propaganda video, along with an instructional article, is about to drop - stay tuned. In the meantime, good appetite.